Export a video
Export your Compose timeline as an MP4, an audio file or a subtitle file, and pick the right settings for where it is going.
Exporting turns your timeline into files you can share. The Export dialog lists what you can export on the left: 'Video', 'Audio only', 'Subtitles' and 'Edit in another app'. Pick one, and its settings appear on the right. A video renders in your browser for free, or in the cloud for credits; audio and subtitle files are always free.
Checklist
Check these before you export, so you only render once:
- Unsolo and unmute any lane you soloed while working. Solo and mute apply to the export.
- Play the whole timeline once and listen for levels.
- Check the last clip ends where you want. Trailing empty time exports as black.
- Turn 'Guides' off if you had them on. Guides do not render, but it is easier to judge the frame without them.
Export a video
- Click 'Export' at the top right. The dialog opens on 'Video'.
- Set 'Render on': 'Cloud' or 'This device'
- Set 'Quality': 'Match timeline', 720p, 1080p, 1440p or '2160p (4K)'
- Set 'Codec': 'H.264' or 'H.265'
- Set 'Subtitles': 'Burn into video (default)', 'Separate SRT', 'Separate ASS' or 'None'
- Check the line at the bottom: the video size, codec and estimated file size, plus the credits for a cloud export
- Click 'Export'
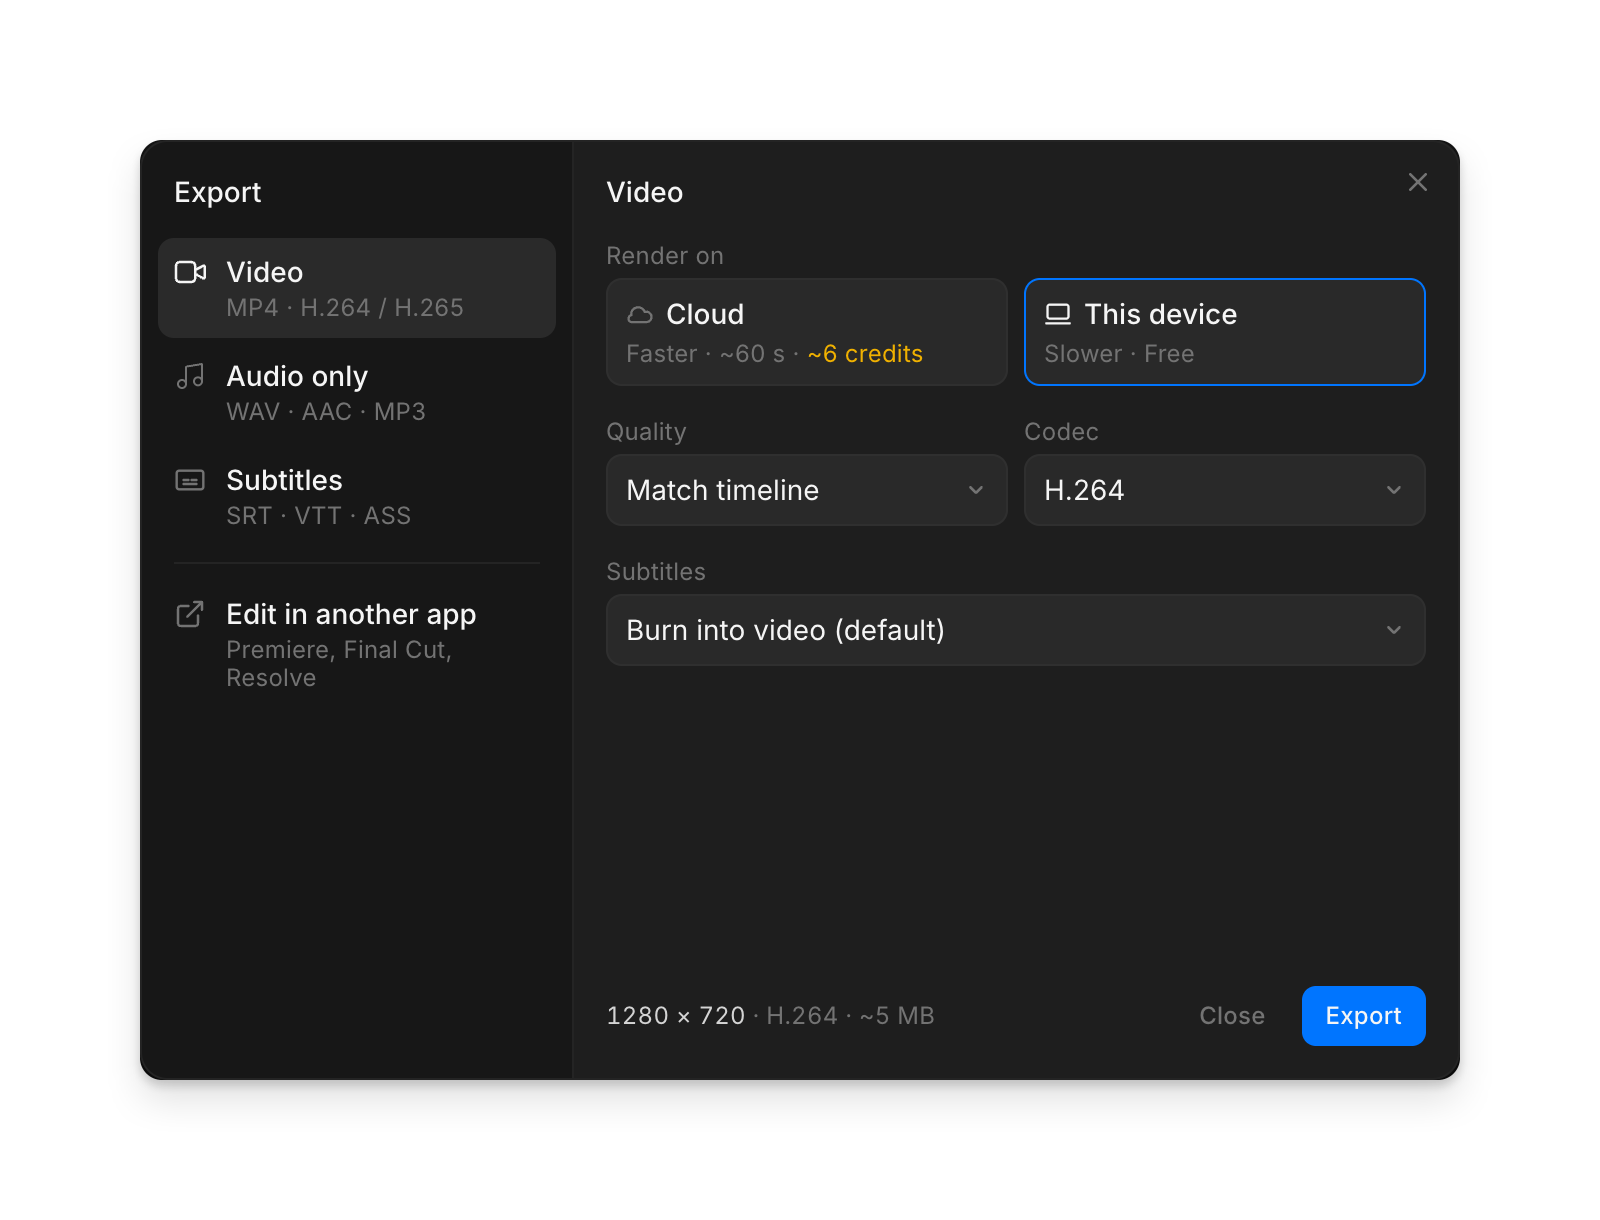
With 'This device', leave the tab open while it works. Closing it stops the export.
You can also ask Copilot to export, from the Compose chat or any chat with a timeline. Copilot renders in the cloud, so it is charged like a 'Cloud' export.
Render on
- 'This device' renders in your browser, on your own computer. It is free and selected by default, and the tab has to stay open until it finishes.
- 'Cloud' renders on Morphic's servers, on any plan, and is faster. The tile shows the expected wait and credits for your timeline, for example '~60 s · ~6 credits'. On the free plan it renders more slowly. You are charged for the time the render runs: when it starts, the credits for the shortest render are set aside, then settled against the actual cost. See Server export on the Plans & Credits page.
Recommended settings
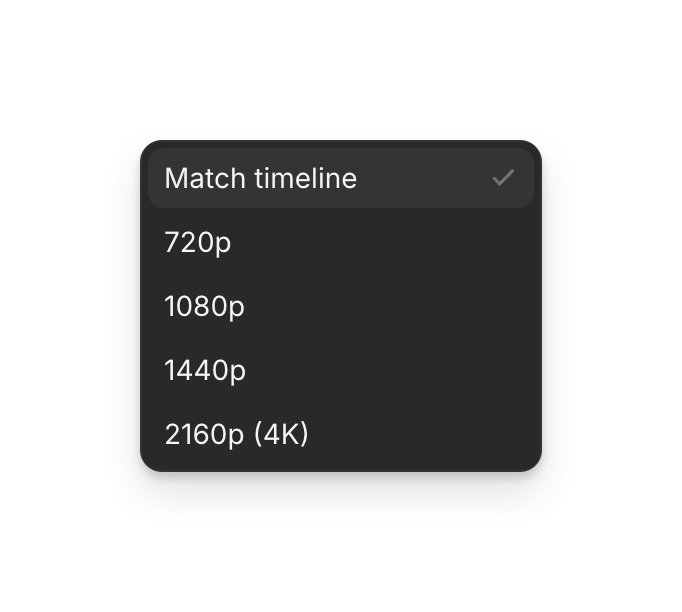
'Match timeline' uses the resolution from your project settings. Start here, and pick a specific size only when you are delivering to a different requirement.
| Where it is going | Quality |
|---|---|
| Social, or a first version for review | 720p |
| Most delivery, and every social platform | 1080p |
| A client who asked for high resolution | 1440p or 2160p (4K) |
A codec is the method used to squeeze the video into a file:
- 'H.264' plays on everything. Choose it for sending a file to someone or uploading it.
- 'H.265' makes a smaller file at the same quality, but not every player supports it.
'Subtitles' decides what happens to your captions:
- 'Burn into video (default)' draws them onto the picture, so they show everywhere and cannot be turned off.
- 'Separate SRT' and 'Separate ASS' leave the picture clean and give you the captions as their own file, for platforms that let viewers switch them on. Pick SRT unless the platform asks for ASS.
- 'None' exports the video without captions.
A 'Cloud' export always burns captions in, and 'None' is only offered on 'This device'. With 'Separate SRT' or 'Separate ASS' on 'Cloud', you get the subtitle file as well as the burned-in video.
The codec does not change the shape of your video. That comes from the project aspect ratio, so set that before you cut rather than at export. See Start a project.
Export audio only
Export the sound on its own: a voiceover for review, a podcast version, or the mix for a sound editor.
- Click 'Export', then 'Audio only'
- Set 'Format':
- 'WAV' is uncompressed (24-bit), for editing and mixing
- 'AAC' is a smaller
.m4athat still sounds clean - 'MP3' plays everywhere
- Set 'Tracks':
- 'Full mix' mixes every track into one file
- 'Stems' gives one file per audio track, in a
.zip. Silent and muted tracks get no file.
- Click 'Export'
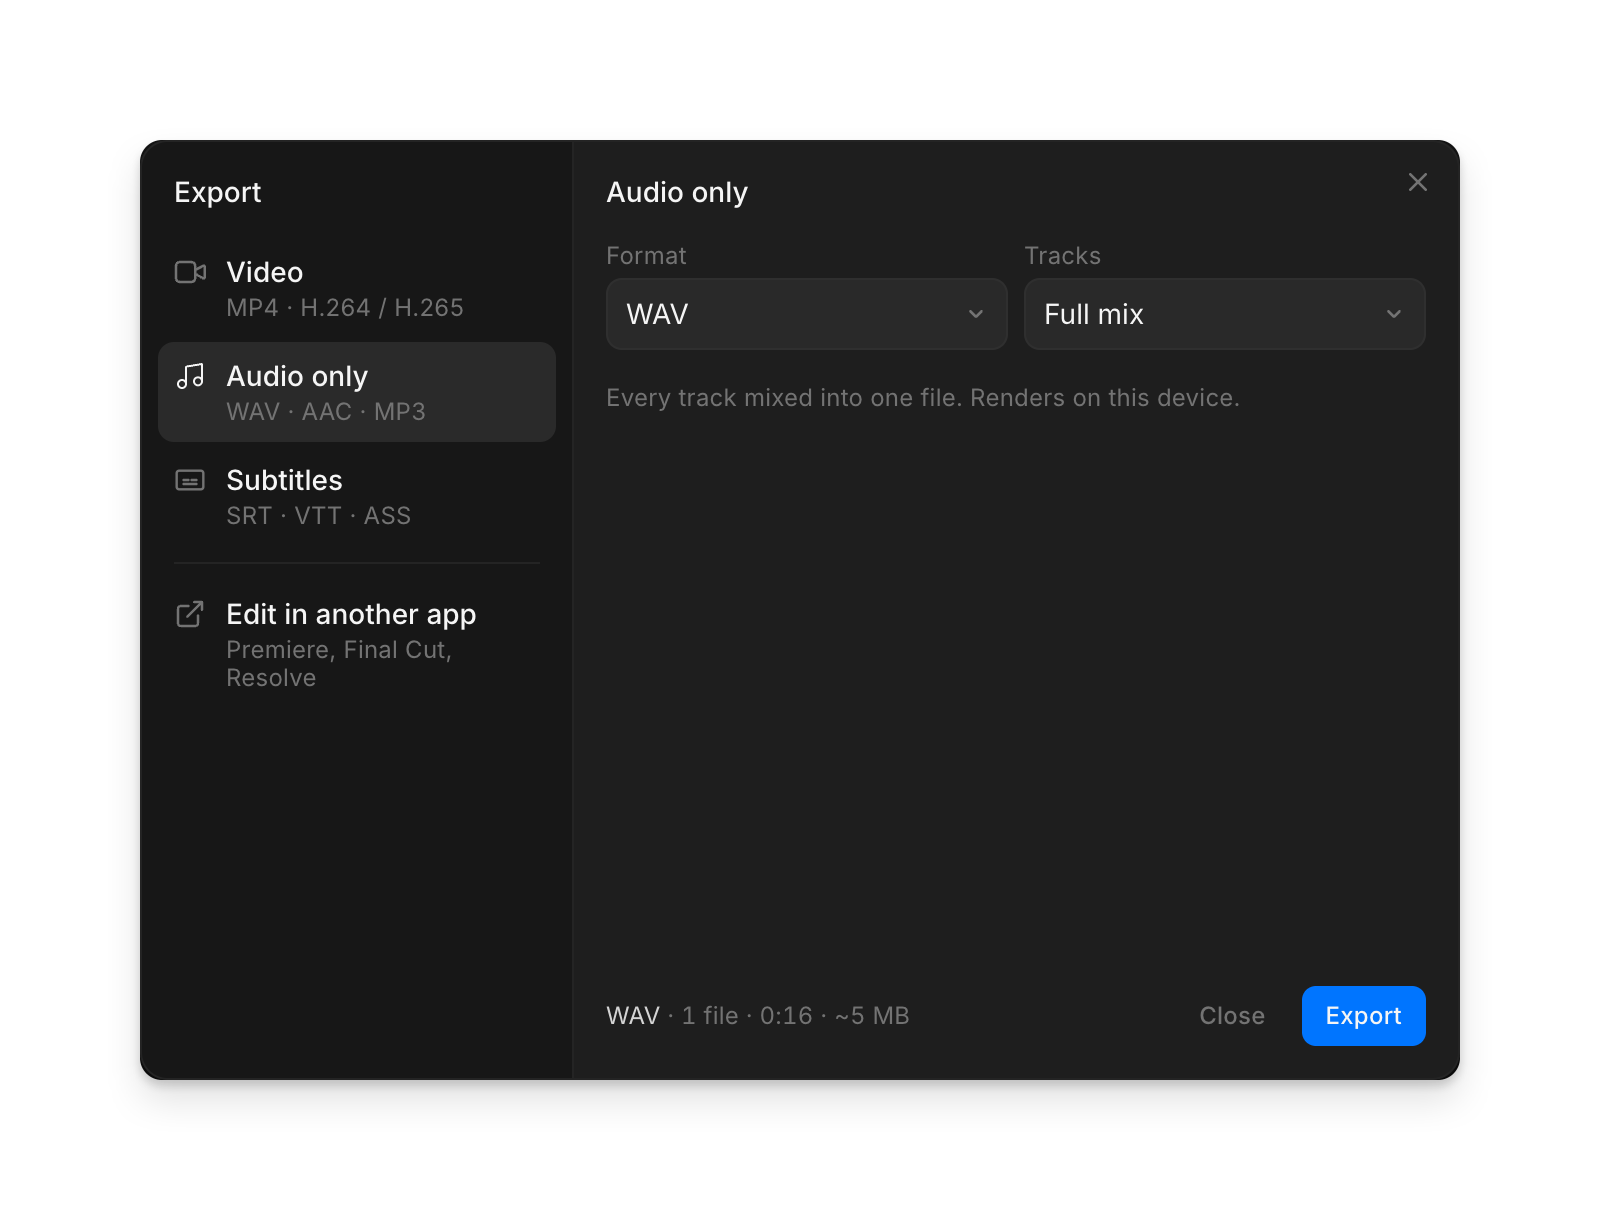
Audio renders on this device and costs no credits.
Export subtitles
Download your captions as a file, with no render. The download starts right away.
- Click 'Export', then 'Subtitles'
- Set 'Format':
- 'SRT' is text and timing, and works on YouTube, TikTok and most players
- 'VTT' is text and timing for web players
- 'ASS' also keeps fonts, colors and position. Animated captions only show as animated when burned in.
- Click 'Export'
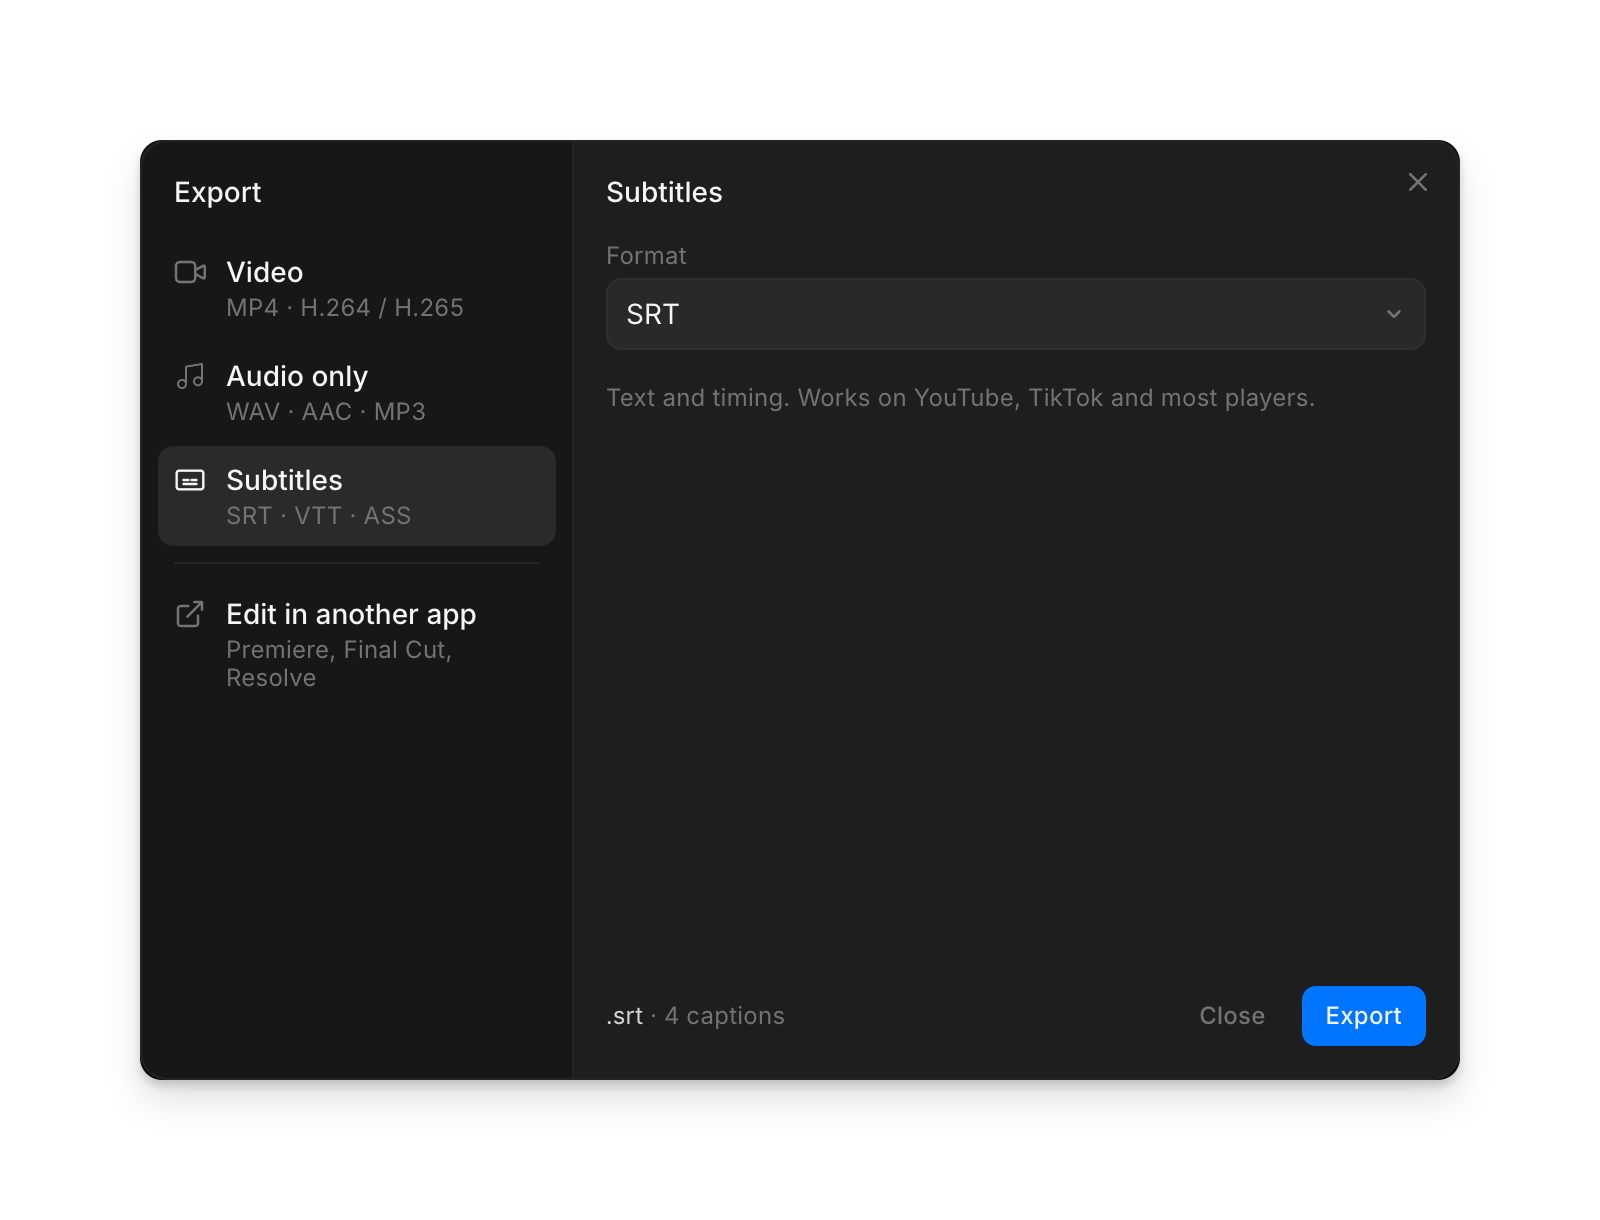
The line at the bottom counts your captions. With none on the timeline, 'Export' stays grey; add them first. See Text and captions.
Edit in another app
To keep editing in Final Cut Pro or DaVinci Resolve, export the timeline as a project instead of a video. See Edit in another app.
Tips
- Export a quick 720p version to check the pacing, then export the real one at full size.
- A long video takes a while. Start it once and let it run; asking again does not make it faster.
- No plan adds a Morphic watermark to an export, Free included.
- An empty timeline cannot be exported. Put at least one clip on it first.
- Exporting does not change your timeline, so you can export as many versions as you need.
- Files are named after the timeline, for example
Timeline.mp3orTimeline.srt.
That's how you export from Compose on Morphic. It is the last step, so settle the color and the sound levels first.
If you have any trouble or have any questions, feel free to reach out. We're happy to help. Write to us at support@morphic.com.